Guide 1 - Setting up AWS for the first time
Use this guide to set up AWS for the first time. If you have already set up AWS and want to work on your project, follow this guide.
Table of contents
- Introduction
- Step 1: Creating an AWS Academy account
- Step 2: Accessing the AWS Dashboard
- Step 3: Creating an SSH key pair
- Step 3: Importing the public key to AWS
- Step 4: Creating an EC2 instance
- Step 5: Connecting to the EC2 instance
- What's next?
Introduction
This guide will help you set up your AWS Academy account so you can work on Hands-On Lab 2. If you successfully follow this guide you will end up with:
- AWS Academy account created
- Access to the AWS Dashboard
- An SSH key pair on your local machine
- An EC2 instance created with your key pair configured
- A remote terminal on the EC2 instance
Keep in mind that everytime you want to work with your AWS project and a new session is started, you will need to repeat some of the steps in this guide so try to understand what is being done and why.
So just to make it clear, this guide is intended to be followed only once; the first time you set up your AWS account. The next time you want to work on your project you should follow this guide.
If you encounter any issues during the setup, please reach out to me at ferran.aran@udl.cat, via Teams message or through the Moodle.
This guide will provide links to external resources. Sometimes you will need to visit them to complete the setup and sometimes they are just for you to learn more about the topic. Make sure to follow the instructions carefully.
Step 1: Creating an AWS Academy account
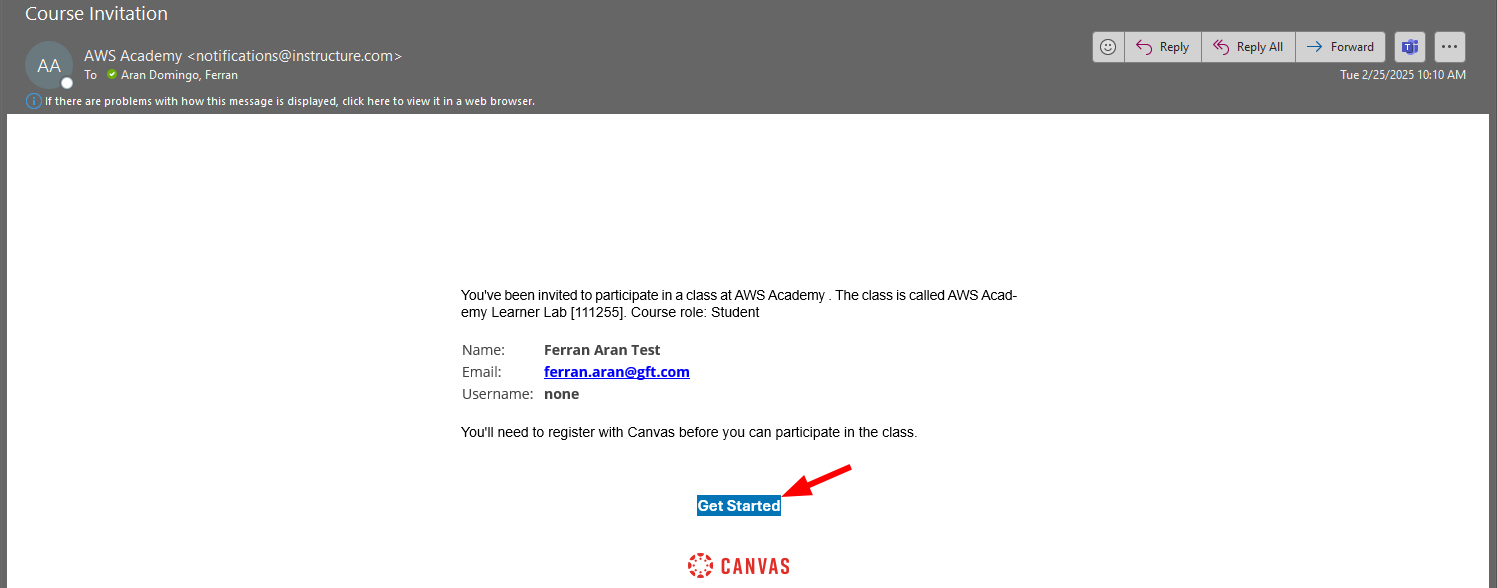
You should have received an email from AWS Academy with the subject "Course Invitation". If you haven't received it, please let me know as I have had to do this by hand and may have missed you. The email will contain a button with the text "Get Started". Click on it to start the registration process. Below is an example of the email you should have received:
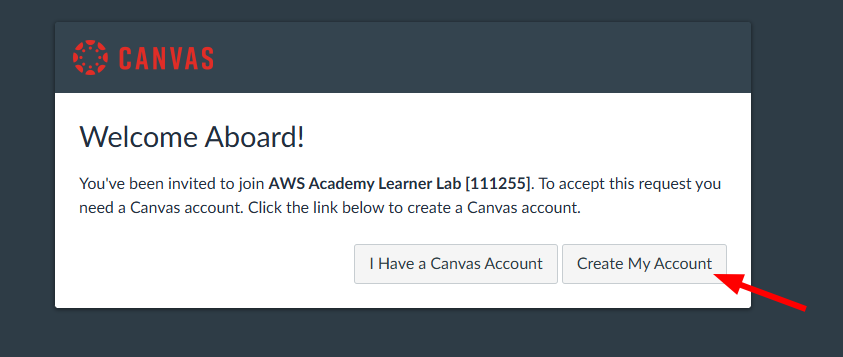
After clicking on the "Get Started" button, you will be redirected to the AWS Academy login page. You should now click on "Create my account" to start the registration process as shown below:
Choose a password and finish the registration process. Once you have completed the registration process, you will be redirected to the AWS Academy dashboard. Congratulations! You have successfully created your AWS Academy account.
Step 2: Accessing the AWS Dashboard
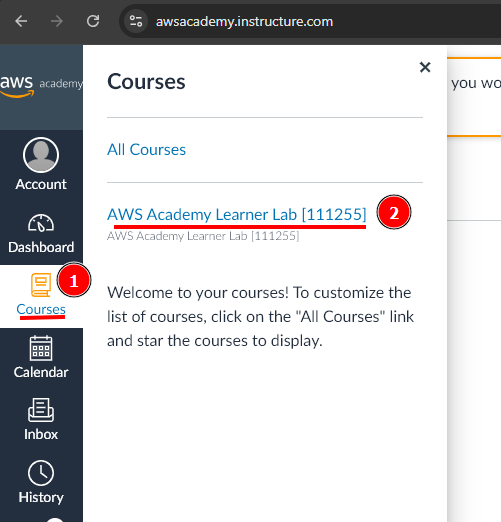
Now that you have created your AWS Academy account, you can access the AWS Dashboard. The first thing you should do is to click on the Courses tab on the left side of the screen. You will see a list of courses available to you. Click on the course AWS Academy Learner Lab as shown in the screenshot below:
The course AWS Academy Learner Lab is the course you will be using to complete the Hands-On Labs (you'll see how in a moment), if you remember on class we talked about the AWS Academy Cloud Foundations course, which is not mandatory but highly recommended for those who want to have a stronger foundation. Notice how there's only one course on the screenshot below, that's not what you should be seeing, you should see two courses, one for the AWS Academy Cloud Foundations and one for the AWS Academy Learner Lab. If you don't see the AWS Academy Cloud Foundations course and would like to have access to it, please let me know since, once again, I had to do this by hand and may have missed you.
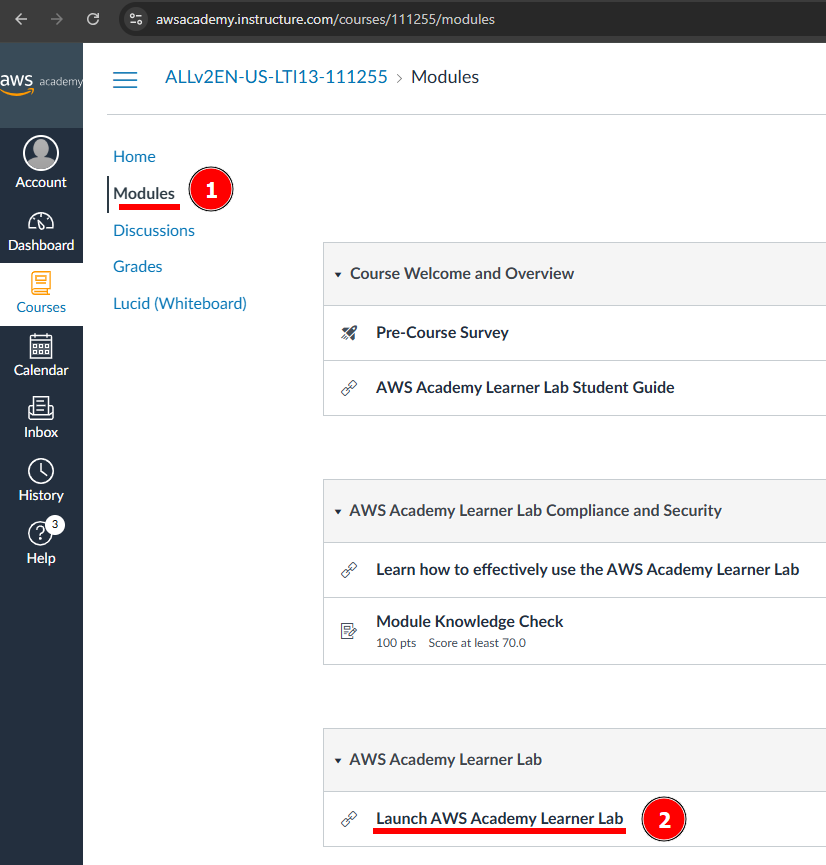
Now we have to look for the Modules tab on the left side of the screen. Click on it and you will see a list of modules available to you. Click on the module AWS Academy Learner Lab as shown below:
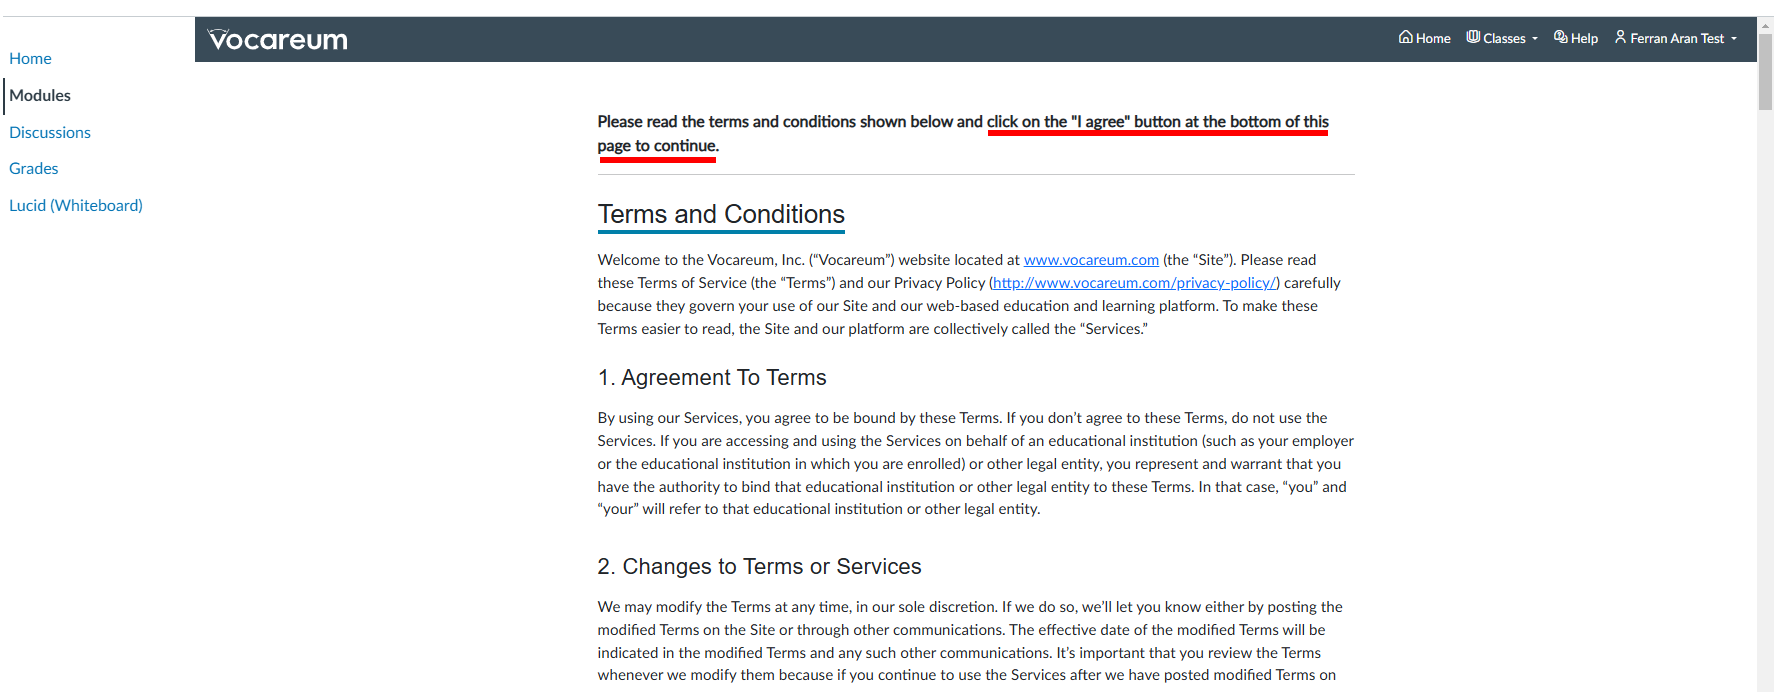
You will now be asked to accept the terms and conditions of the course. To do so, scroll all the way down and click on the I Agree button.
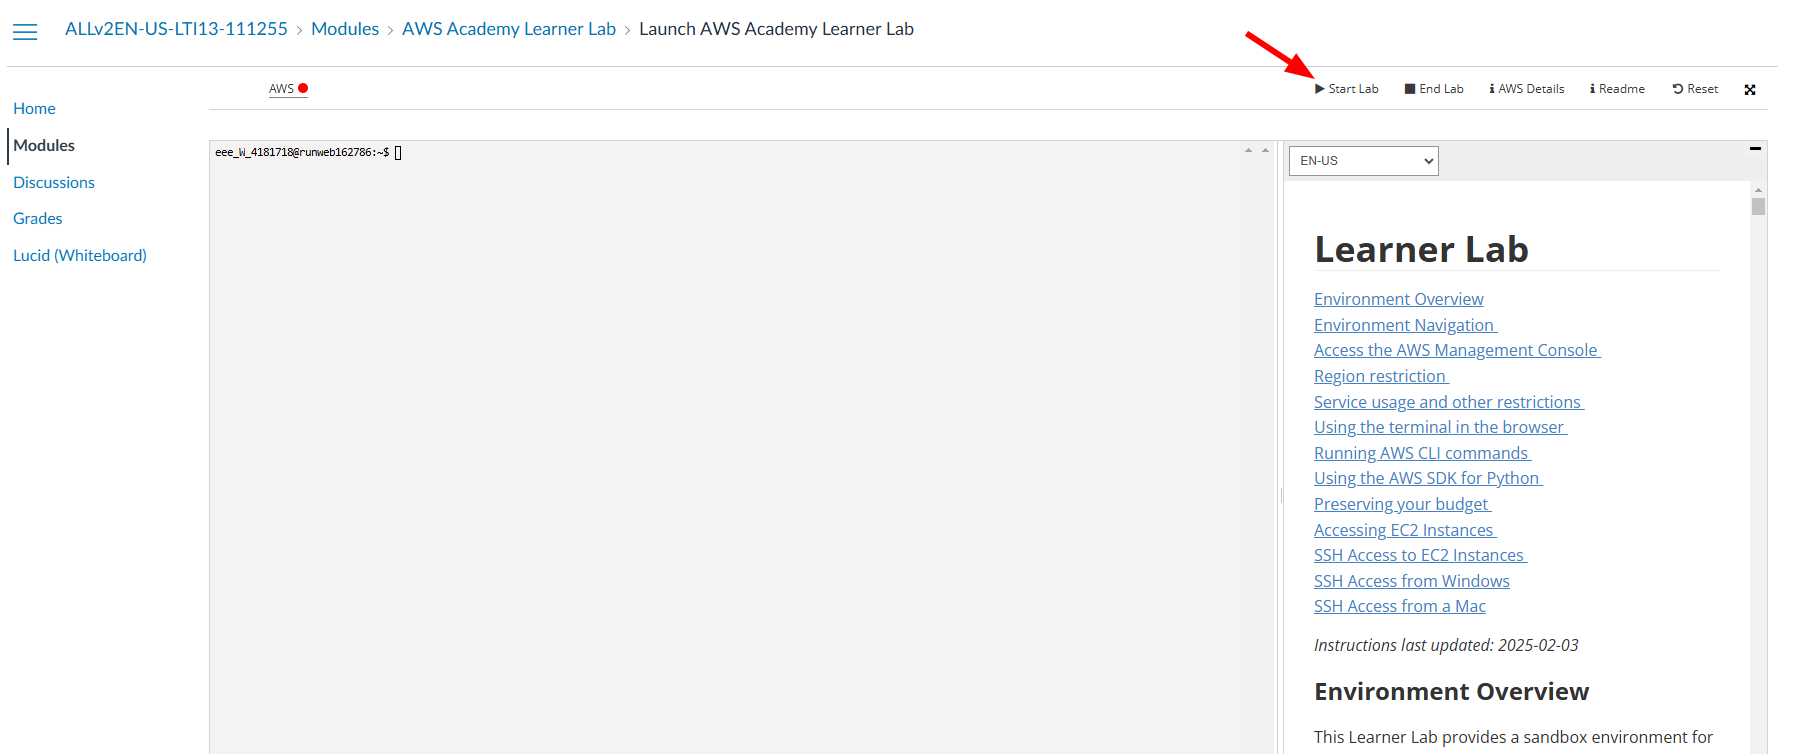
After accepting the terms and conditions, you will now be just a couple clicks away from accessing the AWS Dashboard. You need to first click on the Start Lab button.
I have tested on Firefox and Google Chrome only. Firefox fails to load the lab. If your browser is failing to load the lab I suggest trying a different one.
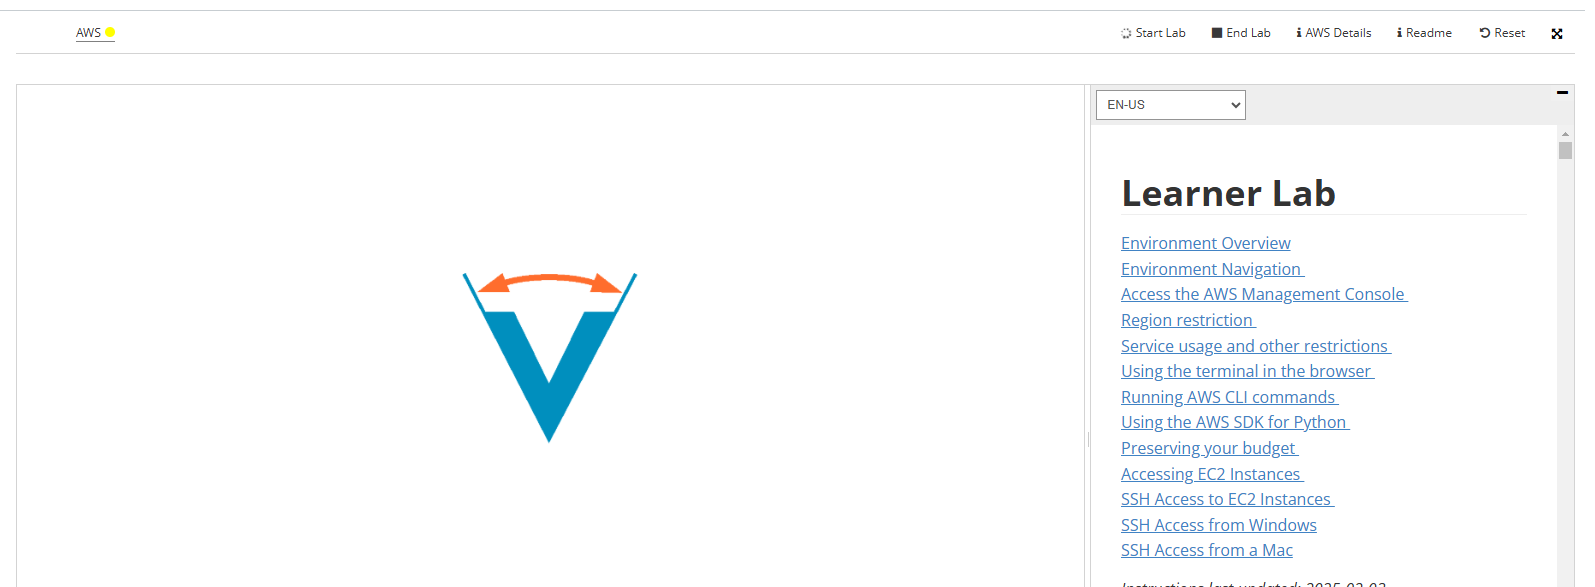
Now give it a couple minutes to load. You'll see this animation while the lab is being prepared for you:
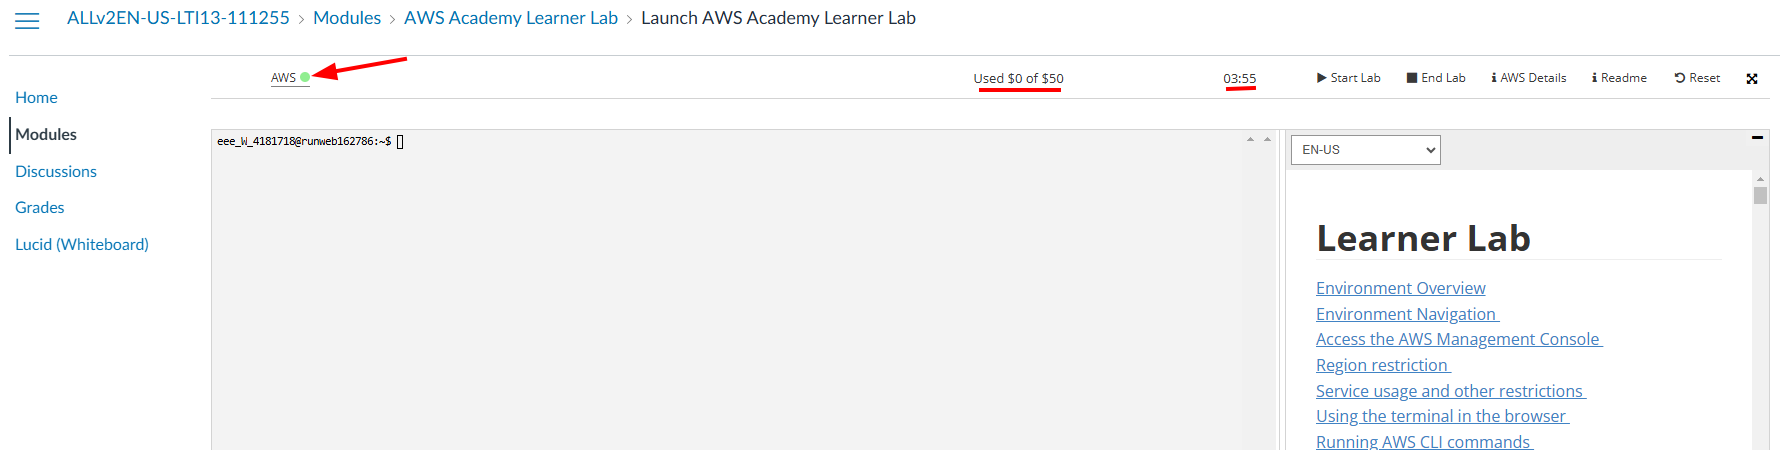
Finally, when the lab is ready, you'll see that the dot next to AWS is green. You'll also se a timer counting down from 4 hours. This is the time you have to work on the lab. To the left of the timer you'll see how's your budget going. You have a budget of $50 to spend on AWS services. Click on AWS to access the AWS Dashboard as shown below.
If you exceed the $50 budget, you will no longer have acces to the AWS Dashboard and will loose your work. Make sure to keep an eye on the budget and if you see that you're getting close to the limit, let me know so I can create a new lab for you.
Great! You have now accessed the AWS Dashboard. You will see a screen similar to the one below:

Step 3: Creating an SSH key pair
Later on this guide we will create an EC2 instance, to work with this remote computer we will need to connect to it using SSH. To do so, we will need an SSH key pair.
We are going to do this using a terminal on our local machine. Remember that a terminal is a program that allows you to interact with your computer using text commands, if this sounds confusing to you I suggest to read through this post. For windows users you can also read this post specifically for the Windows Terminal. MacOS users should already have a terminal installed on their computer. And there is also this great video that is aimed towards a general understanding of the terminal tailored for Data Scientists.
It is really important to understand when are we working on our local machine and when are we working on the remote machine. The first step will always be to open a terminal on our own computer, but once we connect to the remote machine through the SSH command, although it may seem like nothing changed, the terminal is now connected to the remote machine. This means from now on the commands we type will be executed on the remote machine, not on our local machine. If you're not sure if you're working on your local machine or on the remote machine, just type pwd and see what the output is. If it's your local machine, you'll see the path to the directory you're in on your local machine, if it's the remote machine, you'll see the path to the directory you're in on the remote machine. pwd stands for print working directory.
The first step for creating the SSH keypair will be to make sure the .ssh directory extists, to do so, open a terminal on your local machine and type the following command:
mkdir .ssh
The command may throw an error if the directory already exists, that's fine, it just means that the directory was already there. Just to get used to the terminal, we'll use the ls command to list the contents of the directory. Type the following command:
ls .ssh
You should see no output from the command, that's because the directory is empty. It may be that you already had SSH keys created so in that case the ls .ssh command would have written some lines to the terminal listing the files in the ssh folder.
Now we are going to create the SSH key pair. Type the following command:
ssh-keygen -t rsa -f .ssh/aws-keypair
You will be asked to enter a passphras. You can leave it empty by pressing Enter twice (I suggest you do so for simplicity, if not, each time you connect to the remote machine you'll have to enter the passphrase). You should see an output similar to the one below:
Generating public/private rsa key pair.
Enter passphrase (empty for no passphrase):
Enter same passphrase again:
Your identification has been saved in .ssh/aws-keypair
Your public key has been saved in .ssh/aws-keypair.pub
The key fingerprint is:
SHA256:uhINFvYaJh6MbwFQCXdZyrW7W46jFGHUhLglDgQ5OYE ferran@DESKTOP-0841
+---[RSA 3072]----+
|XBooo*+          |
|E.++*o..         |
| O ==o.          |
|. B.=...         |
| o *.=. S        |
|  + o..o         |
| .  ..o .        |
|   .. .*         |
|    .o+..        |
+----[SHA256]-----+
Here, ssh-keygen is the command to generate the key pair, -t rsa specifies the type of key to create, in this case an RSA key, -f .ssh/aws-keypair specifies the file name for the key pair. You can name the file whatever you want, but it is important to remember the name you gave it. In this case we are naming it aws-keypair. I recommend you name it the same way as I do so you don't get confused later on.
You don't need to fully understand how do public and private keys work and how are they used to make an SSH connection, but if you're interested in learning more I highly recommend to watch this video. Note that they suggest using putty to connect to the remote machine when on a Windows computer while I suggest using the terminal, as I said in class this is a personal choice but I will be doing the labs using the terminal so if you want to follow along I suggest you do the same.
Once again, we can check the contents of the .ssh directory by typing the following command:
ls .ssh
And we should now see two files, aws-keypair and aws-keypair.pub. The first one is the private key and the second one is the public key. The private key should never be shared with anyone, while the public key is the one to be shared with the remote machine. A useful command to inspect the contents of a file is cat. For example, to see the contents of the public key, type the following command:
cat .ssh/aws-keypair.pub
You can also inspect the contents of the .ssh folder and the files inside it using the File Explorer (or Finder in Mac devices). But be careful, by default, folders and files that start with a . (like .ssh) are hidden in most file explorers and if you want to be able to see them, you'll have to enable the option to show hidden files. Check this tutorial to see how to do it on your operating system. Another thing to keep in mind is that files extensions (that is the part of the file name that comes after the last ., for example .pdf in whatever.pdf) are also usually hidden, that means that on your File Explorer you may be seeing two files named aws-keypair when in reality one is aws-keypair and the other is aws-keypair.pub. Here is a tutorial on how to show file extensions on your operating system.
You don't have to worry about any of this if you're using the terminal, the terminal will show you the files and their extensions as they are. But to see hidden files and folders (those starting with a .) you'll have to use the ls -a command.
We have now created an SSH key pair that can be used to connect to remote machines. Next up, we are going to be setting up a remote machine on AWS which we can connect to. But first, we need to import our public key to AWS.
Step 3: Importing the public key to AWS
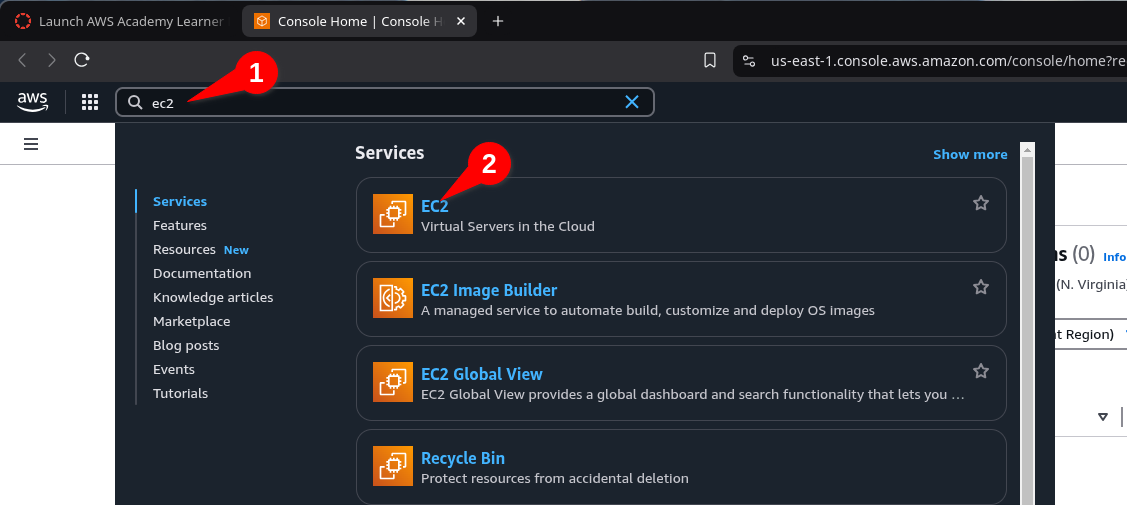
To import the public key to AWS, we need to go back to the AWS Dashboard, which is where we eneded up after finishing Step 2. We are now going to use the search bar to look for the EC2 service. Type EC2 in the search bar and click on the EC2 service as shown below:
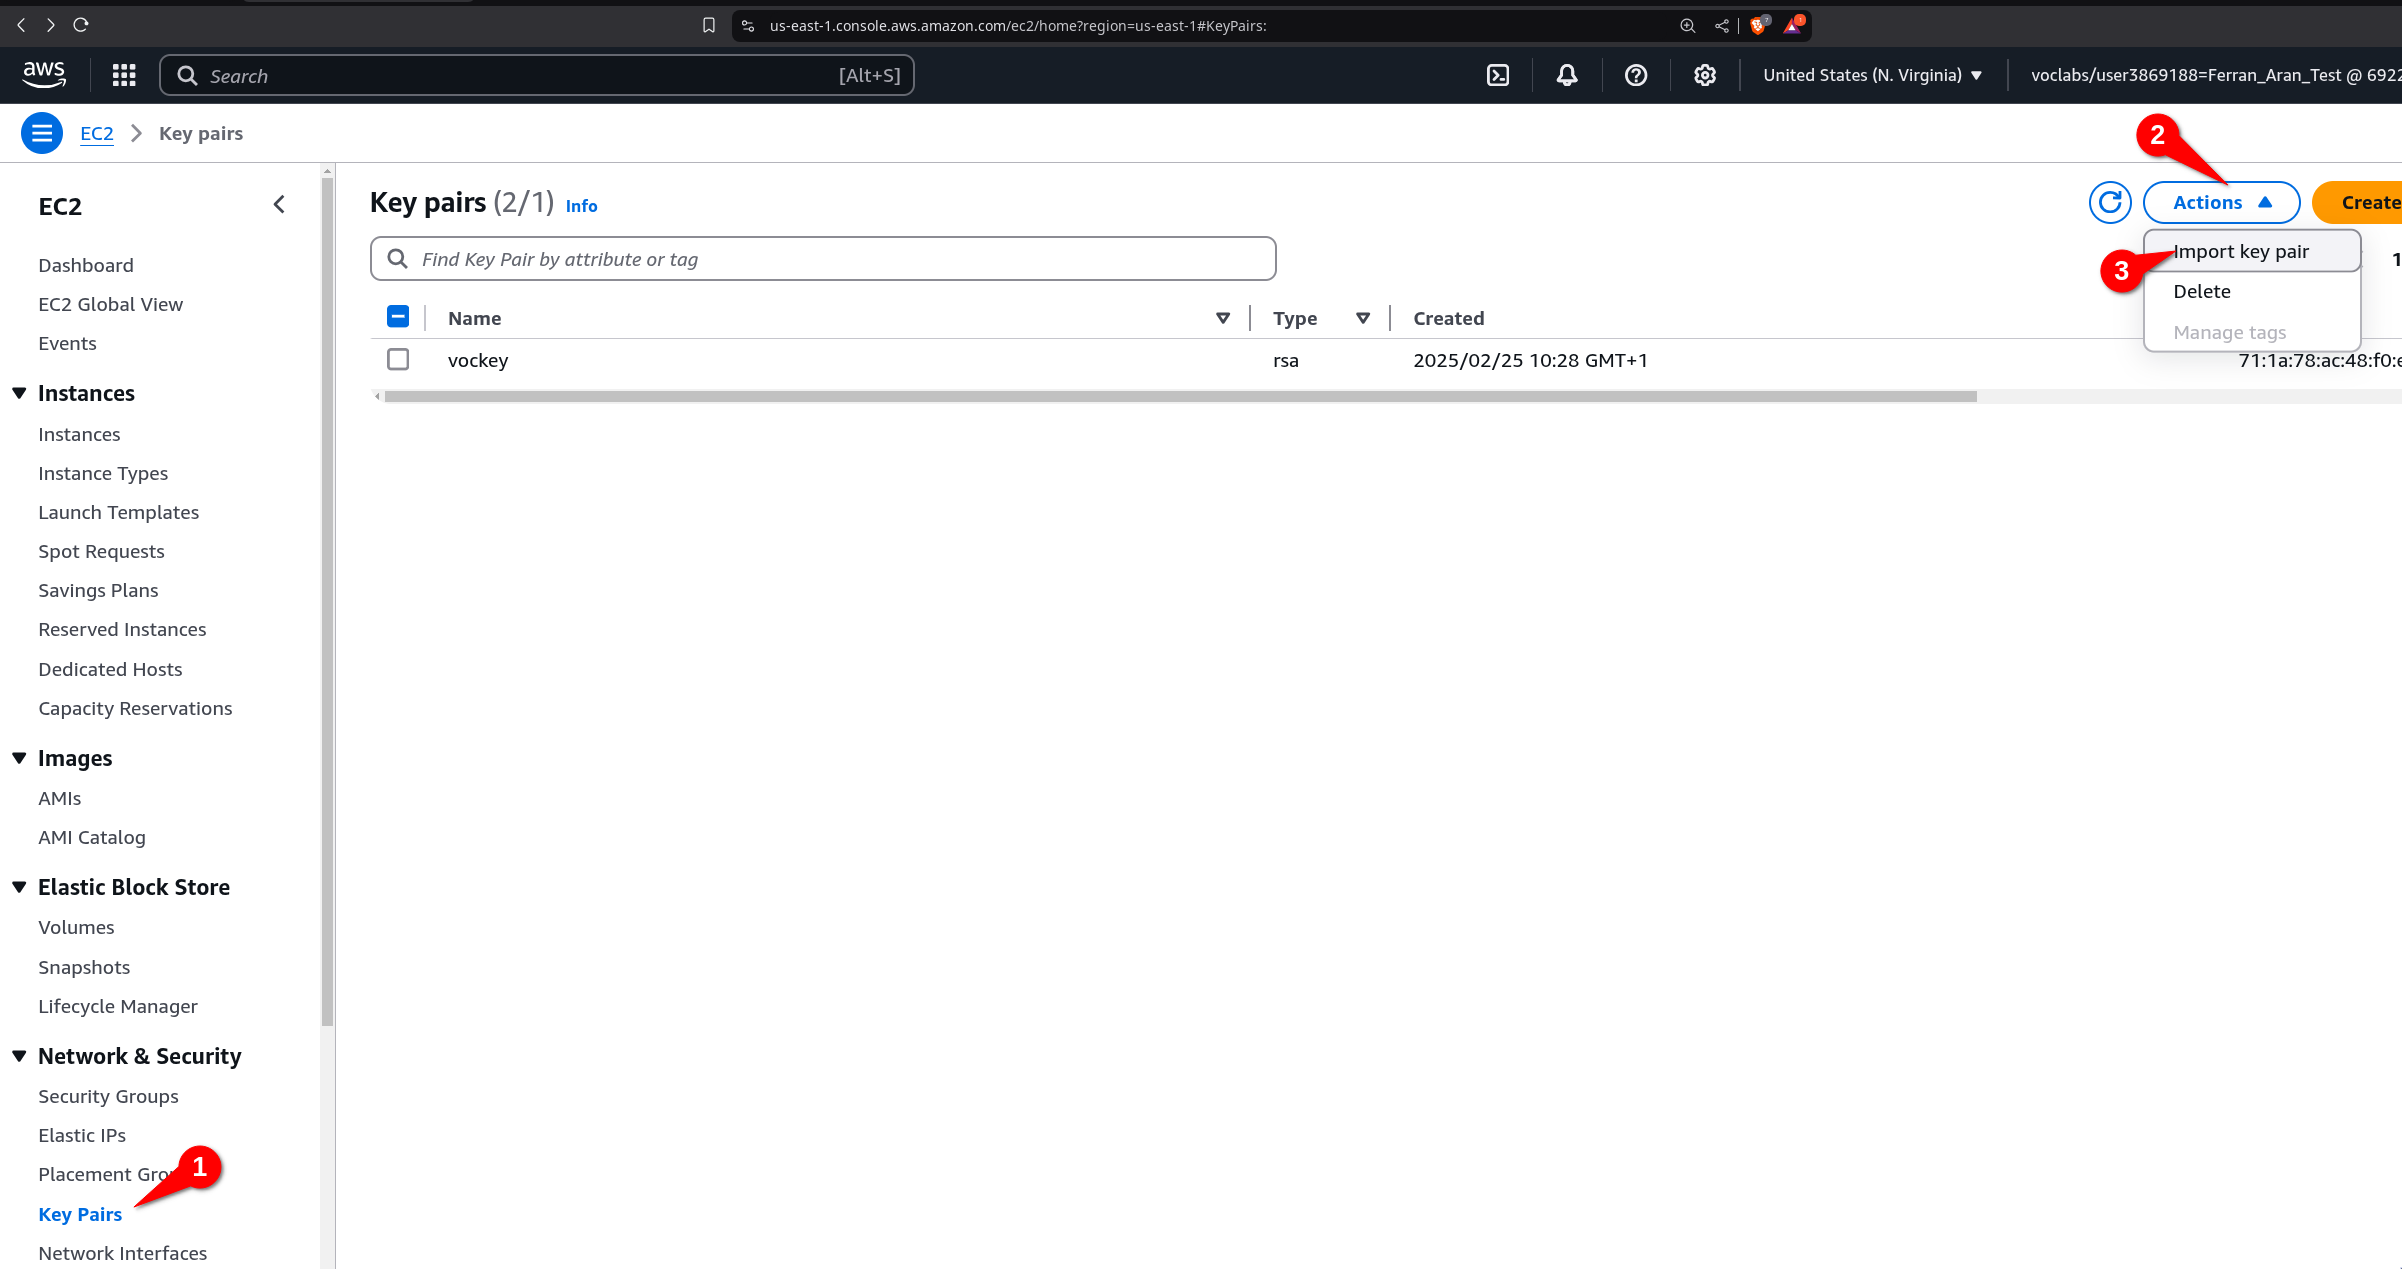
You will now see the EC2 Dashboard. On the left side of the screen, you will see a list of options. Click on Key Pairs > Actions > Import Key Pair as shown below:
You now have to give the key a name. You can name it whatever you want, but I suggest you name it aws-keypair to keep things simple. You will see a text field where you can type, copy the contents of the public key file you created earlier. You can do this by using cat .ssh/aws-keypair.pub and copying the output (it may be the case that in order to copy from the terminal you have to use Ctrl+Shift+C instead of Ctrl+C, or just right click and select Copy). Paste the contents of the public key file in the text field and click on Import Key Pair as shown below:
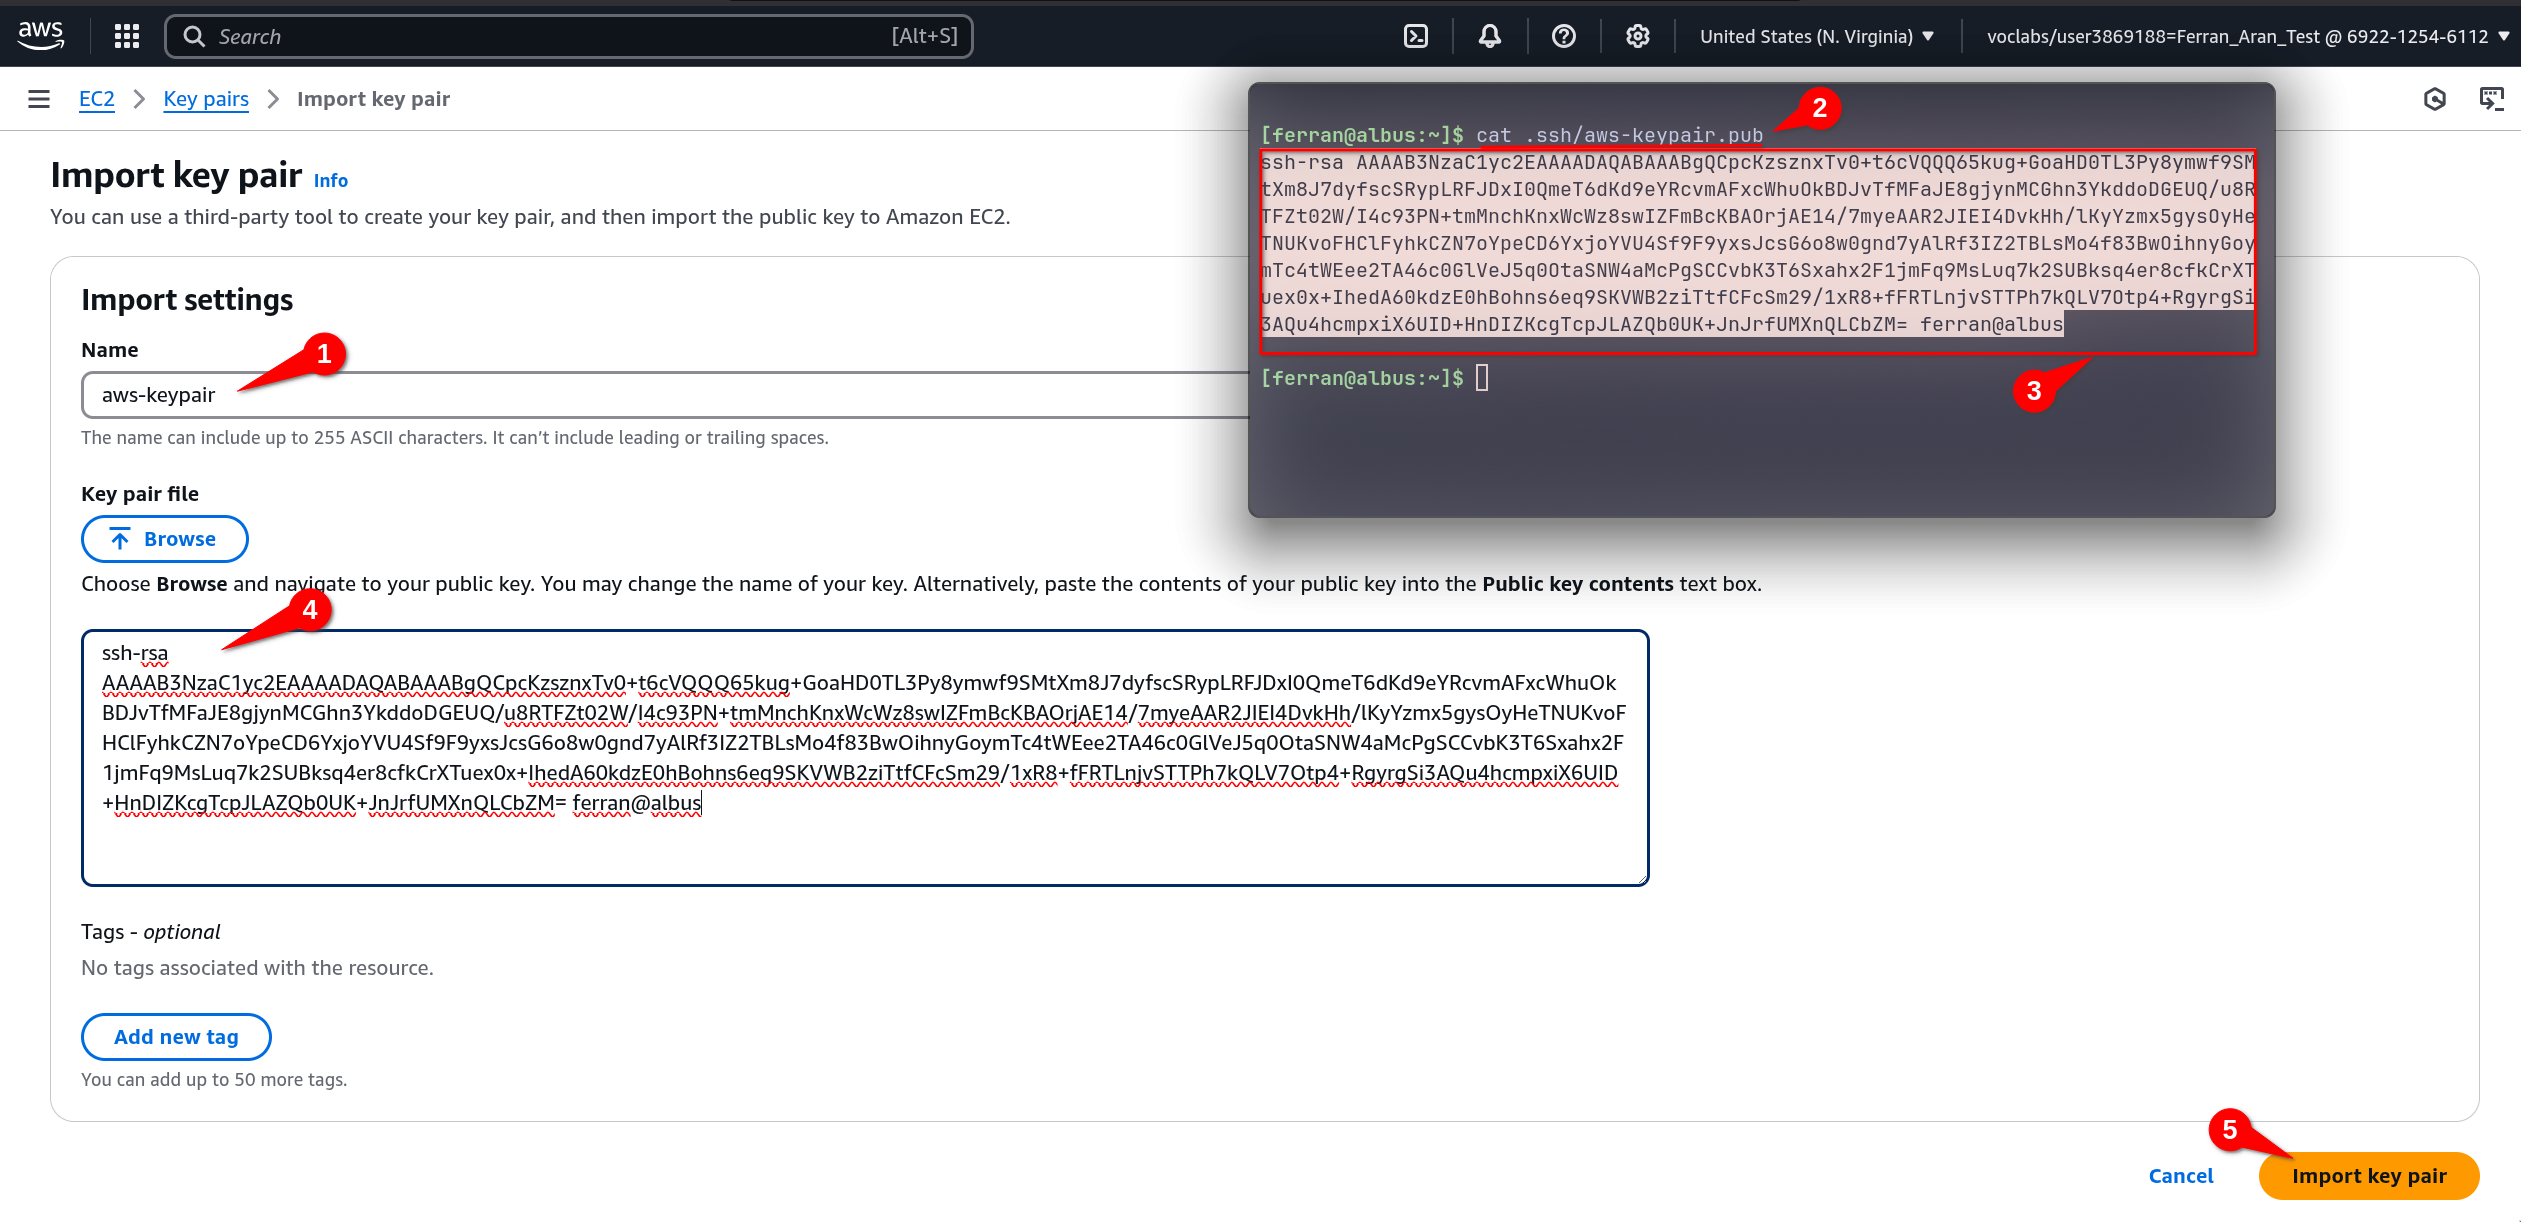
You can also click on the Browse button to select the public key file from your computer. Just click on Browse, navigate to the .ssh folder and select the aws-keypair.pub file. But remember, the file must be the public key file, not the private key file. That is, the file must have the .pub extension. Once you have selected the file, click on Import Key Pair.
Keep in mind that as explained on the previous note, you may not see the .ssh folder in the file explorer and you may not see the .pub extension of the file. If you're having trouble with this, I suggest you use the terminal to copy the contents of the file as shown in the screenshot above.
You should now see the key pair you just imported in the list of key pairs. There will probably be another key pair there, that's fine, you can ignore it. Perfect! You have now imported the public key to AWS. Next up, we are going to create an EC2 instance and configure it to use the key pair we just imported.
Step 4: Creating an EC2 instance
The first step will be to head to the EC2 Dashboard. You can do this by typing EC2 in the search bar and clicking on the EC2 service as we did on the begginning of Step 3:
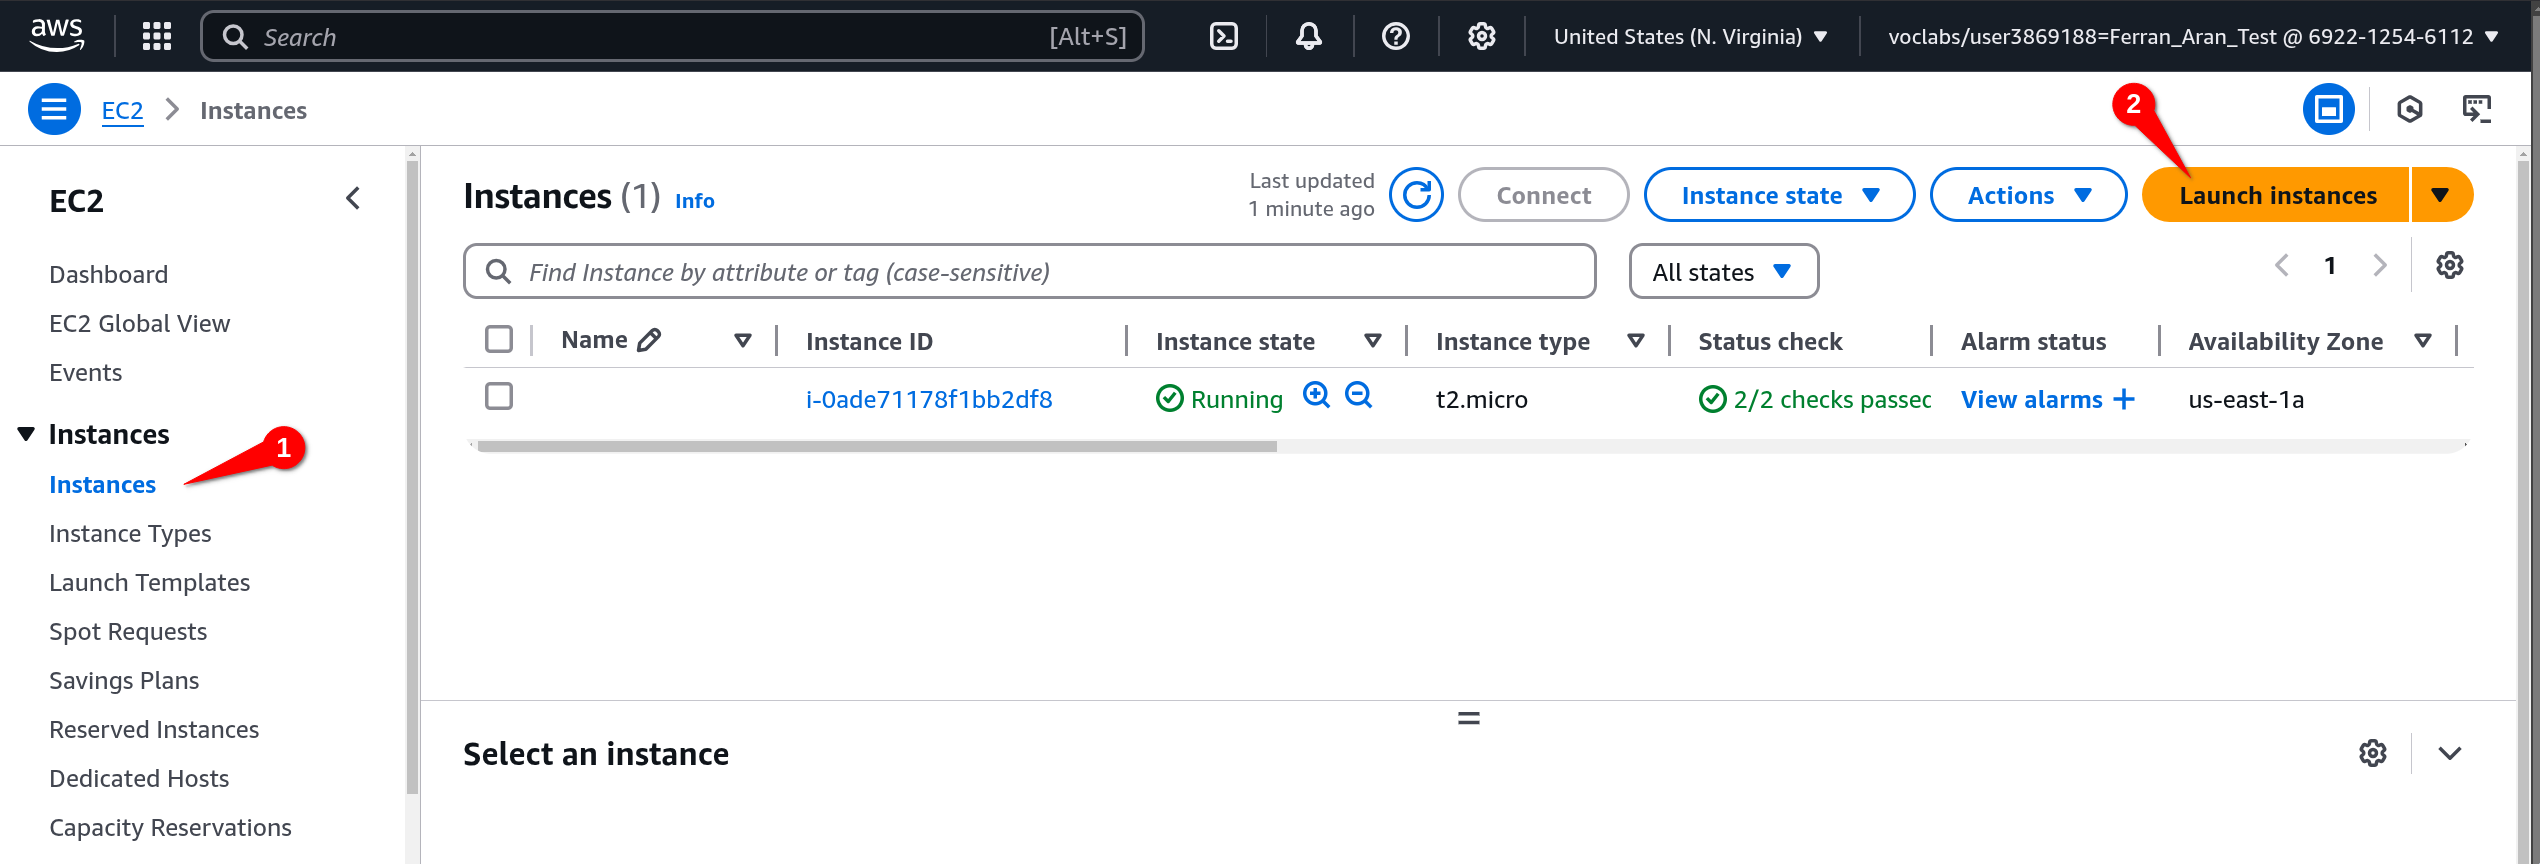
Once you are in the EC2 Dashboard, click on Instances > Launch Instance as shown below:
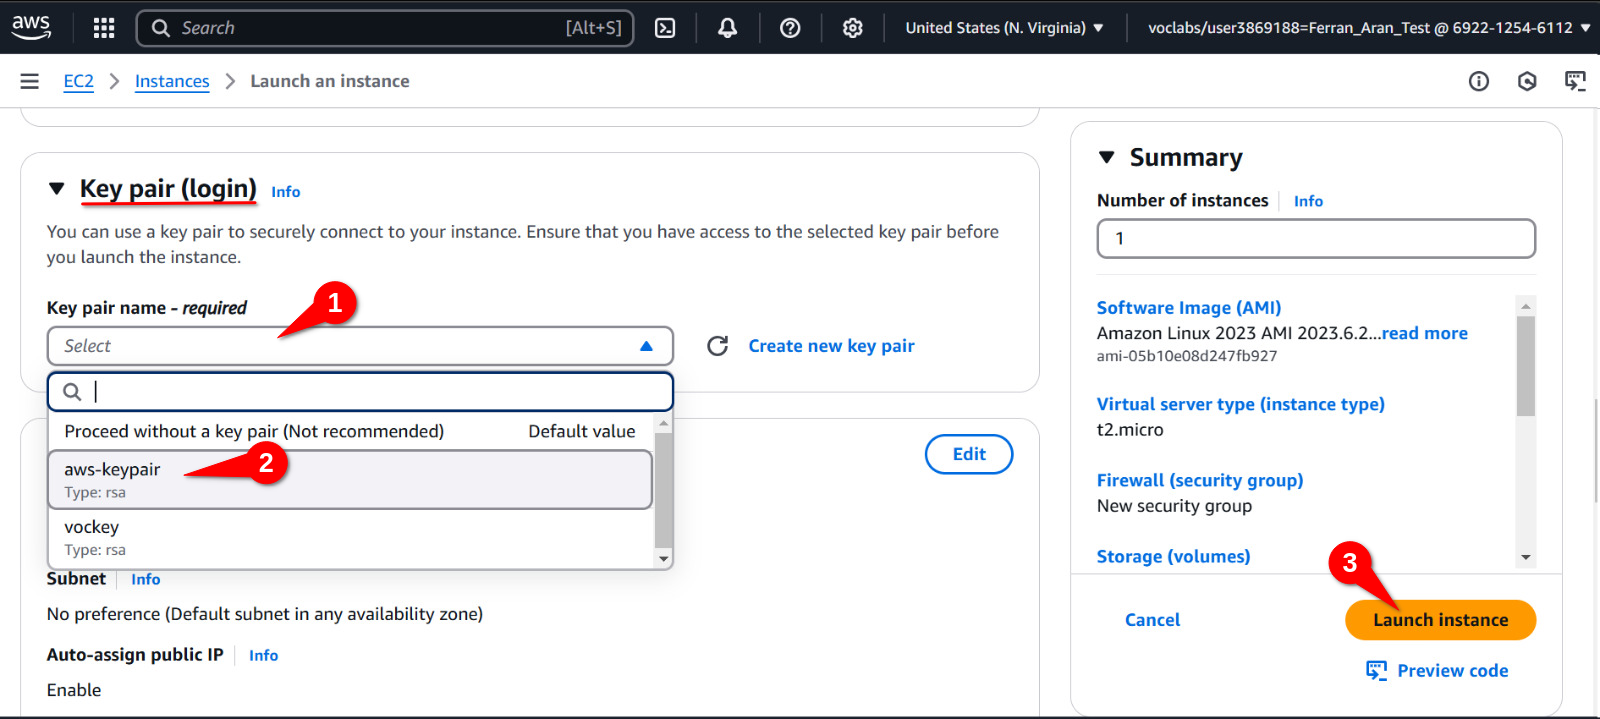
Leave everything as it is except for the Key pair (login) option (you'll have to scroll down to find it). Click on the dropdown menu and select the key pair you imported earlier. In this case, it should be aws-keypair. Click on Launch instance as shown below:
We now have an EC2 instance running with our public key imported. Which means we have a remote machine on AWS that we can connect to from our local computer using SSH. Let's see how to do that.
Step 5: Connecting to the EC2 instance
Before connecting to the remote machine, I want you to try the a couple commands on your local machine which we are then going to repeat once we are connected to the remote machine. One of the commands is pwd which stands for print working directory as alredy discussed earlier. This command will show you the path to the directory you are currently in. The other command is whoami which will show you the username of the user you are currently logged in as. Try these commands on your local machine and remember the output. We are going to repeat them once we are connected to the remote machine.
Below is the output I get on my local machine:
PS C:\Users\fnao> pwd

Path
----
C:\Users\fnao


PS C:\Users\fnao> whoami
gft\fnao
PS C:\Users\fnao>
My local machine happens to be a Windows laptop, notice that your output will be different. Specially if you are on a Mac or Linux machine.
To connect to the EC2 instance, we are going to use the terminal on our local machine. So as we did on the begginning Step 3, open a terminal on your local machine. We are going to use the ssh command to connect to the remote machine. The command will look like this:
ssh -i .ssh/aws-keypair ec2-user@<public-ip>
You will have to replace <public-ip> with the public IP of the EC2 instance. To find the public IP, go back to the EC2 Dashboard and click on Instances on the left side of the screen. You will see a list of instances, click on the instance you just created. You will see the public IP on the bottom of the screen as shown below:
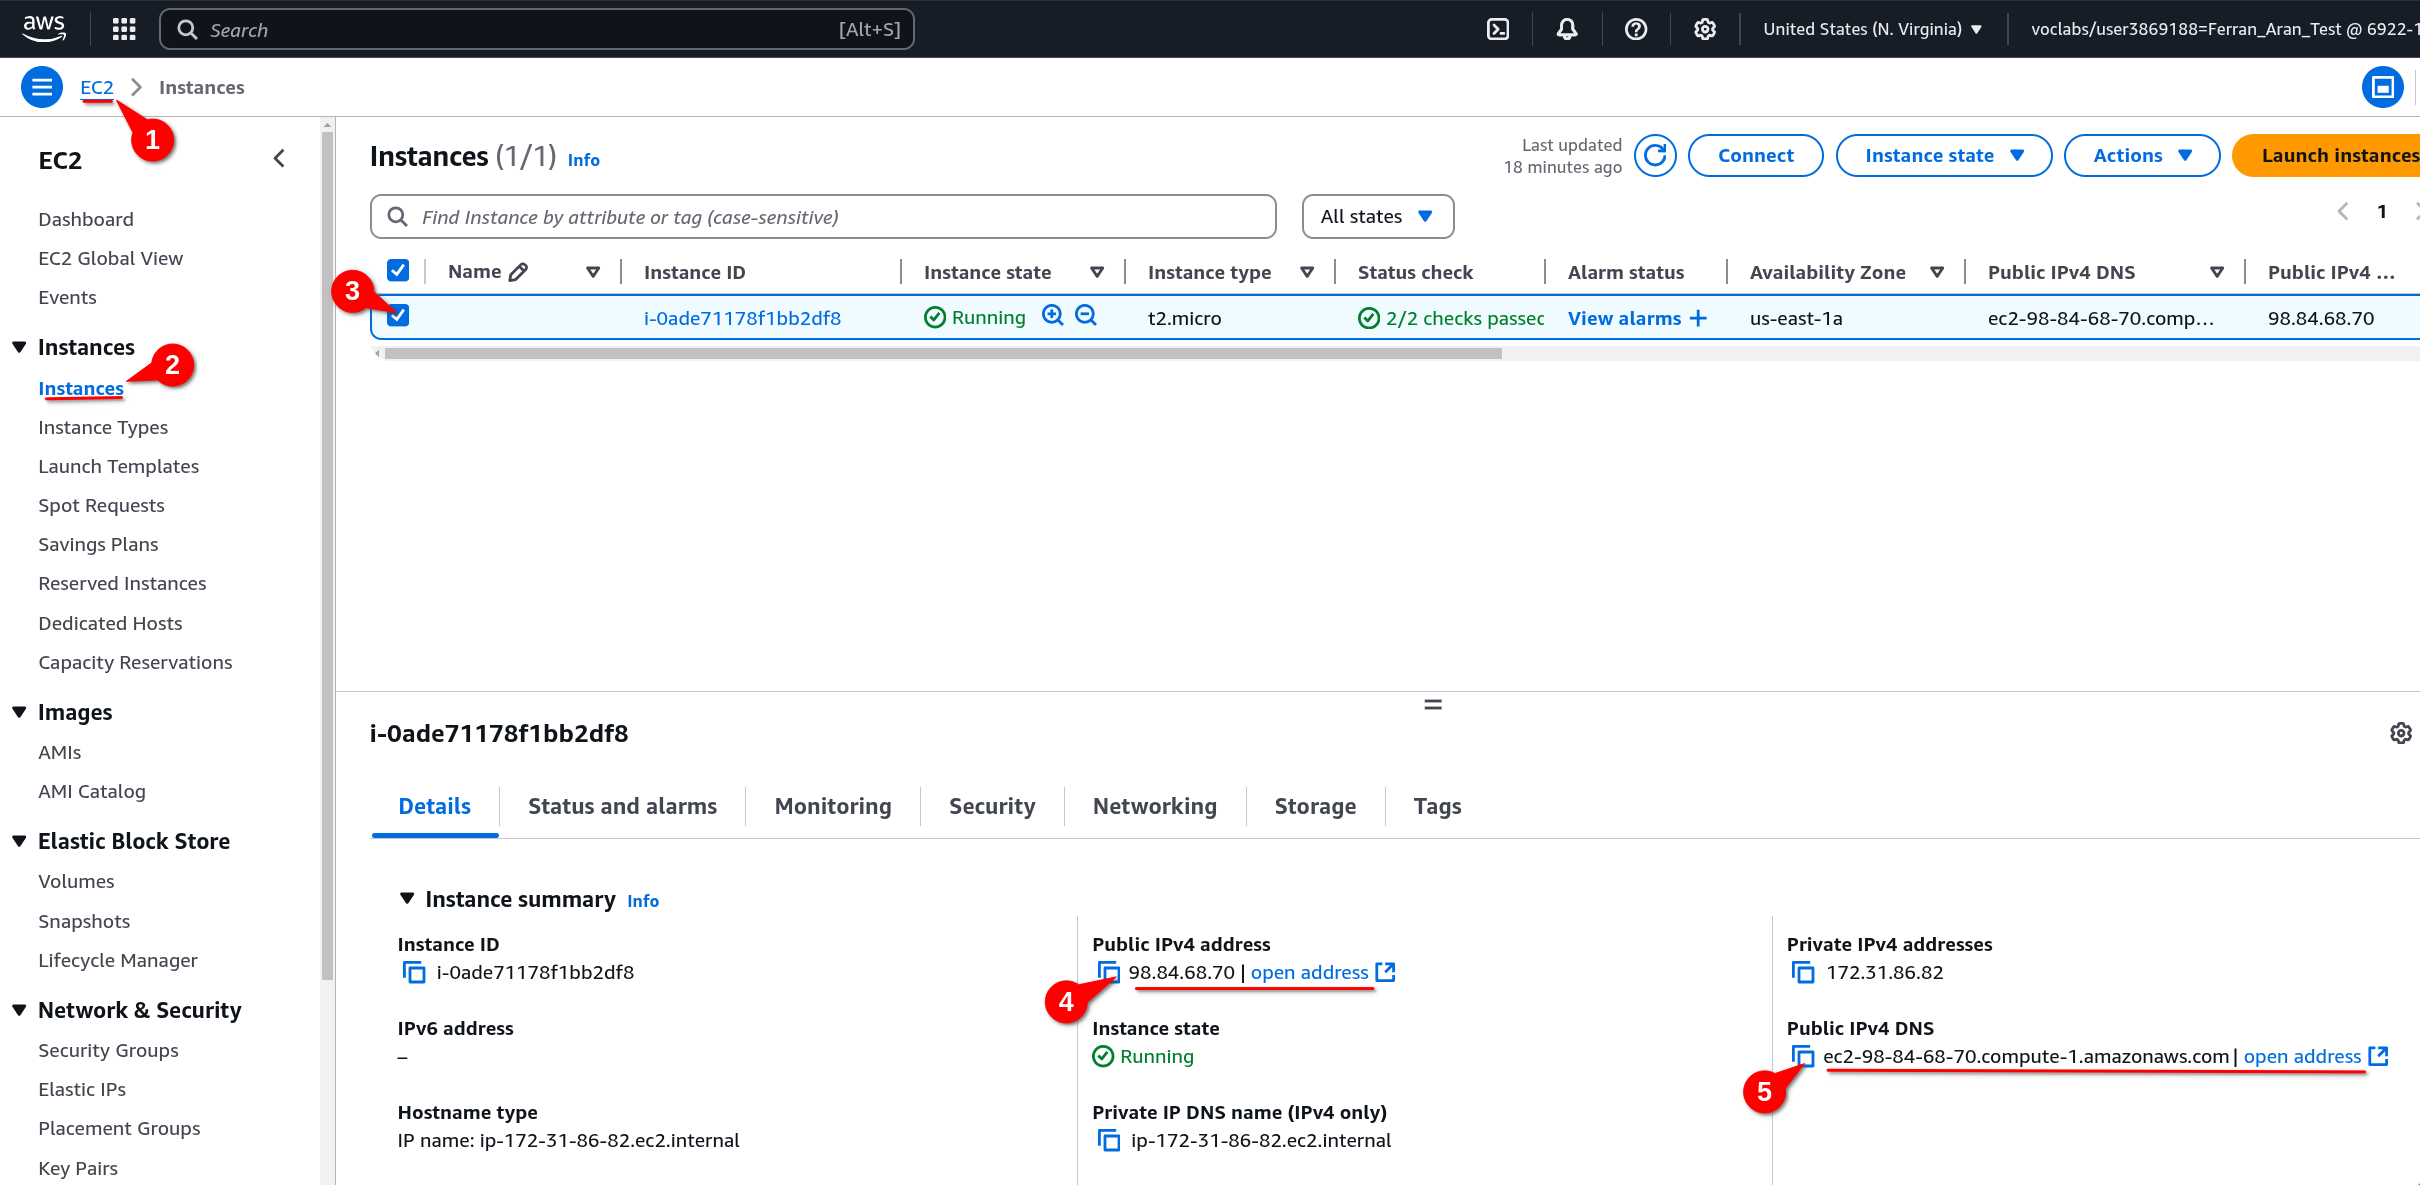
Both the Public IPv4 address and the Public IPv4 DNS can be used as the <public-ip> in the ssh command. Copy whichever you prefer and paste it in the ssh command. The command should look something like this if using the IP address:
ssh -i .ssh/aws-keypair ec2-user@98.84.68.70
or like this if using the DNS:
ssh -i .ssh/aws-keypair ec2-user@ec2-98-84-68-70.compute-1.amazonaws.com
We are going to get a warning the first time we connect to the remote machine. This is normal, just type yes and press Enter. You should now be connected to the remote machine. You will see a prompt similar to the one below:
   ,     #_
   ~\_  ####_        Amazon Linux 2023
  ~~  \_#####\
  ~~     \###|
  ~~       \#/ ___   https://aws.amazon.com/linux/amazon-linux-2023
   ~~       V~' '->
    ~~~         /
      ~~._.   _/
         _/ _/
       _/m/'
Last login: Sun Mar  2 09:50:33 2025 from 79.156.58.43
[ec2-user@ip-172-31-86-82 ~]$
Fantastic! We are now connected to the remote machine. It is important to understand that from now on, the commands we type will be executed on the remote machine, not on our local machine. To check this, type the pwd and whoami commands as we did on our local machine. You should see the output is different. Below is the output I get on the remote machine:
[ec2-user@ip-172-31-86-82 ~]$ pwd
/home/ec2-user
[ec2-user@ip-172-31-86-82 ~]$ whoami
ec2-user
[ec2-user@ip-172-31-86-82 ~]$
This time the output you get should be the same as mine. Notice that the prompt [ec2-user@ip-172-31-86-82 ~]$ is indeed different but that is not part of the outputs of the commands. The outputs of the commands are pwd and whoami which are home/ec2-user and ec2-user respectively. The prompt is just a way to show you where you are in the file system and who you are logged in as.
What's next?
You have now successfully set up AWS for the first time. You have created an AWS Academy account, accessed the AWS Dashboard, created an SSH key pair, imported the public key to AWS, created an EC2 instance and connected to it. All of this and more was covered during Session 3, this guide is ment to help you get to the point where you have an EC2 instance running and you are connected to it for the first time. Once this guide is successfully completed, you should follow this guide to set up your AWS environment each of the next times you want to work with AWS (for example when following Session 4 or working on Hands-On Lab 2).